

How to Wire a Plug - a Step-by-Step Guide
In this step-by-step guide, we will outline how to wire a plug safely. If you feel nervous about working with electricity, you should probably leave this job to the experts. But if you can follow instructions and are careful with all the safety precautions, wiring a plug is just as easy as any other DIY job.
Be warned, though: a lot of home accidents involving electricity are caused by either faulty or incorrectly wired plugs. With this in mind, be sure to follow this guide to the letter. If you are working on an appliance plug, which is not plugged in, there is no danger of getting an electric shock.
Components
Before you start to learn how to wire a plug, you must know the various features of a plug and its wiring to recognise any errors or faults.
The cable
An electric cable consists of two or three inner wires in an outer casing. Each of these wires has a copper core. The outer layers are made of flexible plastic while the inner wires are colour coded.
- Brown-coloured wires go to the Live (L) terminal.
- Blue-coloured wires go to the Neutral (N) terminal.
- Green and yellow wires go to the Earth (E) terminal.
It is important to remember this colour coding when working with electrical cabling. Older appliances may have different colours on these three wires: red will be live, black will be neutral, and green will be earth. Some appliances may also only have two wires within the cable: one live and one neutral.
This only means that they do not rely on the earth wire for protection. However, as there will be no earth wire to connect, make sure the screw on that terminal is screwed in correctly.
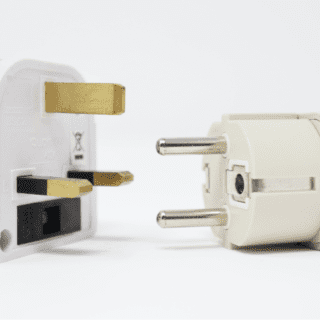
The plug
A plug consists of the case or cover, three pins, a fuse and a cable grip. The case of a plug is the plastic or rubber parts that surround it. Plastic or rubber materials are used because they are good electrical insulators. The pins inside the plug are made from brass because brass is a good conductor of electricity.
The fuse sits between the pin and the terminal and breaks the electrical circuit if the electrical current is too great. It is a safety measure that all appliances have if they prove to be faulty. The cable which is inserted into the plug is secured by a cable grip. This holds the cable itself and not the wires inside the cable.
Normally when working with electrical components, you should always turn off the electricity at the mains. But when rewiring a plug, you are working on something not connected to the electrical system, so there is no need to do this before starting.
Step 1 - Prepare the plug
For the first part on how to wire a plug, you will need to remove the cover on the plug and loosen the screws which hold down the cord grip. Then once the plug is open, loosen or remove the screws from the brass terminals which you will find inside. Be sure to keep the screws in a safe place for later use. You will see the Live (L), Neutral (N) and Earth (E) terminals inside the plug. The fuse holder is also inside the plug, so it is important to use the right fuse for the appliance.
Step 2 - Prepare the flex cable
Measure the flex cable against the plug and strip the outer covering on the flex back as far as the cord grip. Make sure you do not cut through the coloured insulation of the wire strands. The best way of doing this is to slit the cable lengthways with a sharp knife. Peel off the layer and cut it off. If you have to trim the coloured cables, make sure you do not cut them too short. They need to be long enough to reach the terminals without straining. Then strip back about 1cm of the coloured insulation from each wire core.
Step 3 - Fix the flex cable to the plug
When fixing the flex cable to the plug, pass the flex under the loosened cord grip and push it into the grip clamp. Then twist all the exposed wire strands of each coloured wire together. You should use your finger and thumb, ensuring there are no loose strands. Depending on how your plug looks, there are two ways of fixing the wires to the plug:
- If the plug has clamp terminals you have to wrap each coloured core around the corresponding terminal. Then once this is done place the washer on top of the twisted wire and tighten the screw nuts.
- If the plug has pillar terminals, lay the wires around the corresponding terminal and twist it back on itself about 5mm. Do this before inserting it fully into the hole in the terminal. Then tighten the terminal screw. Once this is done you can screw in and tighten the screws on the cord grip. Make sure the clamp is on the outer covering of all three wires of the flex cable and not on the inner coloured cores.
Step 4 - Fit the fuse
The last thing you have to do before you replace the cover is to replace the fuse in the plug with the correct size fuse. Modern appliances are fitted with a sticker telling you the maximum power the appliance consumes. This is shown in Watts.
There are three standard fuse ratings: 3A is used for appliances up to 700W, 5A is used for appliances between 700W and 1200W and 13A is used for appliances over 1200W. As a rule of thumb, if there is no sticker on the appliance, a blue 3-Amp fuse is used for lights and small appliances. A brown 13-Amp fuse is used for larger appliances and heaters.
Step 5 - Finishing touches
Lastly, screw the cover back on. It is important to make sure there are no loose strands of wire in the plug and that no wires will become crushed once the cover is back on. Also, perform an extra check to make sure the three wires are connected to the right terminals. Once the cover is back on and the plug is inserted into the socket, turn the appliance on to check that it is working correctly.
Tools and materials for your next construction project
If you are a keen DIYer, explore our wide range of top-quality building materials such as acoustic insulation, treated timber and suspended ceiling tiles. We also offer trade accounts for our customers working in the industry. When you sign up, you will have access to your knowledgeable account manager. They will help to organise any large or specific orders you may have as well as source products not available on our website.
You can sign up for a trade account today through our website or give the team a call. We offer speedy delivery options to all of our customers across the UK whenever possible. Building Materials Nationwide also saves you time, simplifying the process of buying construction supplies at competitive trade prices.